Category

Home Improvement

Category

An air conditioner that fails twice in one summer rarely has bad luck. Usually it has an unsolved problem. The first visit got the house cool again, everyone was relieved, and nobody asked why the part gave out in the first place. Three weeks later the same thing happens, often on a Saturday.

Every service call in a Florida summer ends up in one of two places. One kind of repair makes the symptom go away. The other kind finds out what caused it. Both can cost about the same on the day. The difference shows up a month or a year later.

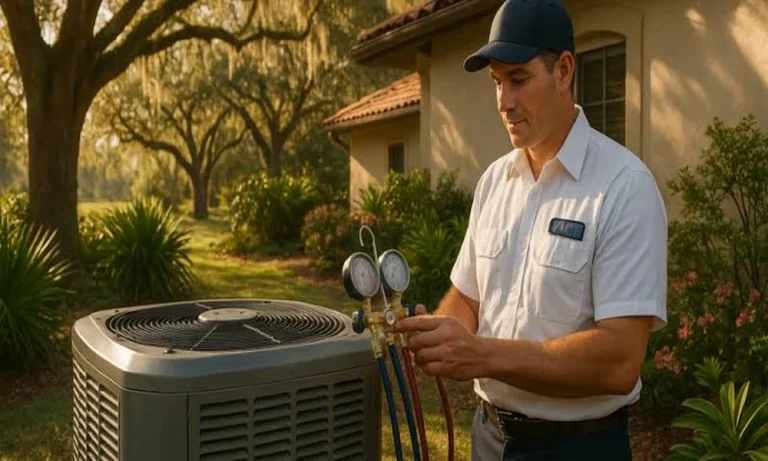
Homeowners searching for Winter Heaven hvac repair after a repeat breakdown are often told the same thing by Lee Rankin and his crew, a family-run outfit working out of 320 3rd St SW. The fix that lasts comes from finding the cause behind the failed part. Their NATE certified technicians take emergency calls around the clock and work on all makes and models. Many of their Google reviews come from people who called them for a second opinion after another company kept treating the same symptom.

Six Repairs and Their Two Versions

Most of the AC calls in Polk County fall into a short list of complaints. Each has a fast version and a thorough version.

What the homeowner notices The quick fix What the real fix checks
Outdoor unit hums but won’t start Swap the capacitor Motor amp draw, capacitor rating, surge damage, voltage at the unit
Air blows but isn’t cold Add refrigerant Where the refrigerant went and whether the leak can be repaired
Water in the closet or a tripped float switch Flush the drain line Line slope, trap, venting, algae buildup, secondary pan
Ice on the indoor coil or copper lines Thaw it and restart Filter, blower speed, closed returns, dirty coil, low charge
Breaker keeps tripping Reset it Compressor draw, pitted contactor, loose wiring, insects in the panel
System turns on and off every few minutes Replace the thermostat Equipment sizing, thermostat placement, refrigerant charge

The quick fix is not always wrong. Sometimes a capacitor is simply old and worn out. The trouble starts when the repair stops at the part and nobody asks why it failed.

Why Capacitors Keep Dying in Polk County Backyards

The run capacitor is the most commonly replaced part on a Florida condenser, and the climate explains much of it. A metal cabinet in full sun bakes the capacitor all afternoon. Heat breaks it down over time. Central Florida also sees more lightning strikes than almost anywhere else in the country, and power surges damage capacitors too.

A second failure in one season is a different story. It can mean the fan motor is drawing too much current and wearing the new capacitor out. It can also mean the replacement had the wrong microfarad rating, or that the voltage at the house sags under load. A technician who reads amperage on the motors before leaving finds those problems on the first visit, not the third.

Topping Off Refrigerant Versus Finding the Leak

An air conditioner does not use up refrigerant the way a car uses gas. The system is sealed, so a low charge means it leaked somewhere. Adding more without searching for the leak is like pumping up a tire with a nail still in it. The cooling comes back for a while, and the bill comes back too.

ENERGY STAR’s maintenance checklist points out that having too much or too little refrigerant both hurt efficiency and shorten the life of the equipment. Indoor evaporator coils in humid Florida homes can develop pinhole leaks from corrosion. Brazed joints and valve cores on the outdoor unit are other common spots. A real repair uses an electronic detector, bubble solution or a nitrogen pressure test to find the leak.

Type of refrigerant changes the math. Older systems still running R-22 depend on a refrigerant that is no longer produced, so each recharge gets expensive. Newer equipment is moving to lower-impact refrigerants such as R-454B and R-32. For an aging R-22 system, finding a leak often prompts a talk about replacing the unit rather than another recharge.

Water Where Water Shouldn’t Be

In a Florida summer, an air conditioner pulls gallons of water out of the air every day. That water runs out through a PVC drain line, and algae grows inside it. Flushing the line with a wet vac clears the clog. But if the line has poor slope, no vent or a trap with sludge in it, the clog will come back.

A thorough visit checks the run of the line from end to end. It also tests the float switch and checks the secondary pan for rust. That matters most in an air handler in the attic, where a hidden overflow can quietly damage a ceiling.

Frozen Coils and Tripped Breakers

Ice on the indoor coil looks dramatic, but it is a symptom. Restricted airflow is usually behind it, from a clogged filter, a weak blower, a crushed return duct or furniture blocking returns. Low refrigerant is the other common cause. Letting the coil thaw and walking away guarantees it will freeze again.

Breakers trip for a reason too. Florida adds one odd cause. Fire ants are drawn to the electrical field in outdoor contactors and pack themselves between the contacts. A technician who finds a pitted contactor or ants in the panel has found the real fix. A technician who only flips the breaker back on has not.

Signs You Got the Thorough Version

The paperwork often tells you which kind of repair you got. A visit that went after the cause usually leaves you with these.

  • Readings on the invoice, such as refrigerant pressures, motor amp draw or the temperature drop across the coil
  • An explanation of why the part failed, not just which part was replaced
  • A note about anything else that is borderline, so it doesn’t become a surprise later
  • Options with prices attached when repair and replacement are both reasonable

A good technician can also show you the burned contactor, the bulging capacitor or the algae plug in the drain line.

In a climate where the AC runs almost all year, the gap between a quick fix and a lasting repair adds up fast.

Most homeowners think about earthquakes in terms of the big one. The dramatic shake, the cracked wall, the news footage. But Hawaii’s seismic reality is quieter and, in some ways, more damaging than that. The islands sit on one of the most geologically active spots on the planet, and the cumulative effect of dozens of minor tremors, micro-settlements, and volcanic soil movement wears down a residential foundation over decades in ways that no single dramatic event would.

If your home is more than 15 years old, there’s a real chance it has absorbed ground stress you’ve never felt but your foundation absolutely has.

Why Hawaii Is a Uniquely Demanding Place to Build a Foundation

The Hawaiian Islands didn’t form the way most land does. They pushed up through the Pacific Plate from volcanic hotspots, and that origin story shapes everything underneath your home right now. The soil profile across Oahu and the other islands is wildly inconsistent. You might have dense basalt bedrock 10 feet down in one yard and saturated alluvial fill in the next. That inconsistency is the root cause of most foundation trouble here, because a foundation built without accounting for what’s directly beneath it will eventually move toward the path of least resistance.

The Hawaii State Hazard Mitigation Plan identifies areas underlain by NEHRP Class D and E soils as particularly susceptible to liquefaction, a process where loosely packed, saturated sediment temporarily loses structural strength during seismic shaking. According to the 2018 State of Hawaii Hazard Mitigation Plan, liquefaction risk concentrates in coastal and low-lying areas, which covers a substantial portion of where Honolulu’s residential neighborhoods actually sit. That’s not a theoretical risk. It’s a documented condition under many existing homes.

And the earthquakes themselves are constant. Hawaii averages hundreds of recordable seismic events per year. Most are too small to feel, but the cumulative micro-strain on a concrete footing or a shallow slab adds up over 30 years in ways that periodic inspections routinely miss.

The Three-Layer Foundation Stress Model

Here’s a framework I find useful for thinking about how Hawaiian seismic conditions actually degrade a foundation. Think of foundation stress as operating on three distinct layers simultaneously:

  • Acute stress: Visible damage from a significant seismic event. Cracked slabs, shifted footings, jammed doors. This is what most homeowners watch for.
  • Chronic stress: Repeated micro-movement from minor tremors and soil expansion cycles that causes hairline fractures and gradual differential settlement. This is what most homeowners miss.
  • Latent stress: Pre-existing soil conditions, fill soil that was never properly compacted, or a foundation originally designed without adequate depth. These vulnerabilities sit dormant until seismic activity or soil moisture changes activate them.

Most foundation failures in Hawaii happen when chronic and latent stresses meet. The house has been slowly moving for years, the soil beneath was never ideal, and then a moderate earthquake or a wet season tips the whole system into visible damage. By that point, you’re dealing with a problem that started long before the symptom appeared.

This is exactly why surface-level repairs, patching cracks or releveling slabs without addressing what’s below, rarely hold for more than a few years in this environment.

What Differential Settlement Actually Looks Like in a Honolulu Home

Take a post-World War II concrete block home in Kalihi. The footings were built to the standards of the 1950s, which didn’t account for deep soil variability the way modern geotechnical surveys do. The lot was graded with fill material. Over 70 years, the fill has compressed unevenly. One corner of the home has dropped roughly half an inch more than the opposite corner.

You’d notice it as a door that no longer latches, a crack running diagonally from the upper corner of a window frame, or a floor that feels subtly off when you walk across it. None of these things look like earthquake damage. All of them are the result of cumulative seismic and soil stress working together over decades.

The fix for that scenario isn’t a patch. It’s a structural solution that reaches past the compromised fill to competent soil or rock beneath it. That’s why homeowners in situations like this typically turn to deep foundation installation experts in Hawaii who can assess what’s actually happening below the surface and anchor a structure to something stable, rather than just addressing what’s visible from the top.

How a Growing Construction Market Shapes the Risk Landscape

Hawaii’s construction industry has expanded significantly in the past decade. According to Hawaii’s Department of Business, Economic Development and Tourism, the total value of construction as measured by the contracting tax base reached $11.8 billion in 2023, with construction payroll jobs hitting a historic high in late 2024. That volume of new residential and commercial construction means more structures going up across varied soil conditions, often at speed.

Speed and soil variability are a poor combination. When site preparation doesn’t include deep geotechnical assessment, homes get built on soil profiles that look fine at the surface but hide the NEHRP Class D and E conditions that make seismic stress so damaging over time. The boom in construction is great for the local economy, but it also means a wave of newer homes that could start showing foundation stress within 10 to 20 years if the ground conditions beneath them weren’t properly characterized at build time.

A Practical Checklist for Hawaii Homeowners

You don’t need to be a structural engineer to stay ahead of seismic foundation stress. Work through this checklist once a year, ideally after Hawaii’s wet season ends:

  1. Walk the perimeter of your home and look for new diagonal cracks in exterior walls or the foundation itself. Hairline horizontal cracks are less urgent. Diagonal and stair-step cracks in block walls are a signal to act.
  2. Open and close every exterior door. A door that binds or no longer sits flush in its frame is one of the earliest signs of differential settlement.
  3. Check interior floors with a 4-foot level in multiple rooms. A slope you can feel but haven’t addressed is worth measuring.
  4. Look at your driveway or any concrete flatwork adjacent to the house. Separation between the slab and the foundation or visible sinking near one edge suggests the soil underneath is moving.
  5. If your home was built before 1975, commission a geotechnical assessment that includes soil boring data. The original construction likely predates modern seismic codes and certainly predates awareness of liquefaction risk zones.

“Low-rise buildings might sink, but high-rise buildings which are anchored in the underlying rock should be able to survive without collapsing.” The Hawaii State Hazard Mitigation Plan drew that contrast to highlight a basic engineering truth: depth of anchor determines resilience. For residential structures that can’t reach bedrock through traditional shallow footings, modern remedial systems exist specifically to replicate that deeper connection.

Acting Before the Symptoms Get Loud

The homeowners who spend the least on foundation repair are not the ones who react fastest after a visible problem appears. They’re the ones who understood their soil conditions early, scheduled periodic assessments, and caught differential settlement while it was still measured in fractions of an inch rather than structural misalignment.

Hawaii’s seismic environment won’t slow down. The ground here moves, and it has been moving under your home since the day it was built. The question isn’t whether cumulative stress is affecting your foundation. For most homes on this island older than 20 years, it almost certainly is. The only real question is how far along the damage curve you’re sitting right now, and whether you address it while options are still straightforward.

Most homeowners never think about their gutters until water is pouring through the ceiling or the basement smells like a marsh. By that point, a $200 cleaning has turned into a $4,000 foundation repair. The good news: gutters give off real, visible warnings long before the expensive damage starts. Knowing what to look for puts you weeks ahead of the problem and keeps a small fix from becoming a structural nightmare.

Why Michigan Winters Make This Especially Urgent

Michigan is not a forgiving climate for exterior home systems. According to NOAA’s State Climate Summaries (2022), Michigan’s long-term statewide average precipitation is 31.7 inches annually, and the number of extreme precipitation events – days with 2 or more inches – has been increasing since 2000, with record-high multi-year values recorded for the most recent periods in the dataset. That means your gutters are not just channeling springtime drizzle. They’re handling heavier downpours more often, and in winter, they’re carrying the weight of ice dams forming at the roofline.

Washtenaw County, Jackson County, and Lenawee County all sit in a zone where freeze-thaw cycles happen repeatedly from November through March. Each cycle expands and contracts the metal in your gutter system. Over several seasons, that movement works on every joint, hanger, and seam in ways you can’t see from the ground – until a storm hits and the damage becomes obvious.

So watch for these five signs. Any one of them deserves attention. Two or more at once means you’re already behind.

Sign 1: Gutters That Visibly Sag or Pull Away from the Fascia

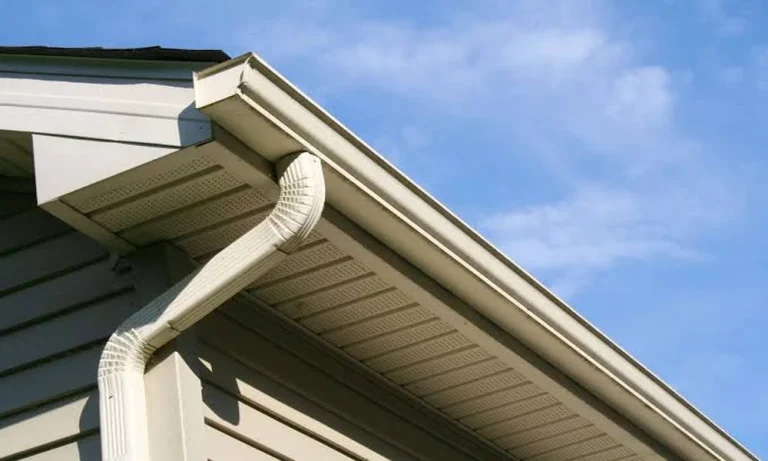
Run your eye along the roofline from the street. The gutter should form a clean, straight line with a slight pitch toward the downspout. If you see a dip, a bow, or a section pulling away from the board behind it, the hangers have failed. This happens when debris builds up, water pools instead of draining, and the added weight strains the hardware over time.

A sagging gutter doesn’t just look bad. It collects standing water, which breeds mosquitoes in summer and becomes a solid block of ice in winter. That ice adds more weight, pulls the gutter further, and can pry the fascia board right off the house. Fix the hanger spacing first; if the fascia itself has rotted, that board needs to go before any new hardware is attached.

Sign 2: Paint Peeling or Rust Streaks Below the Gutter Line

Orange-brown streaks running down your siding, or paint that’s bubbling and peeling in a strip directly beneath the gutter, tells you water has been escaping somewhere it shouldn’t. The gutter is overflowing, leaking at a seam, or simply pitched the wrong direction.

Rust streaks on aluminum gutters specifically come from screws or hangers that have corroded. They won’t clean off; the hardware needs to be replaced. Paint damage on the siding is a secondary problem – you’ll deal with it after the root cause is fixed, not before.

“Foundation damage from water intrusion is one of the most expensive and entirely preventable home repair categories. The overwhelming majority of cases trace back to improper drainage at the roof and grade level.” – A frequently cited principle in the residential building inspection community, consistent with findings from the National Association of Certified Home Inspectors training materials.

Sign 3: Water Pooling Near the Foundation or Eroded Mulch Beds

Stand outside during a heavy rain. If water is sheeting off the roofline and hitting the ground in a concentrated stream rather than being directed away from the house through a downspout, your gutters are either clogged or your downspouts are discharging too close to the foundation.

The soil around your foundation acts as a slow sponge. Chronic oversaturation weakens it, and over enough seasons, the pressure from waterlogged soil causes cracks in poured concrete walls and block foundations. The U.S. Census Bureau and HUD’s 2023 American Housing Survey found that 11.8 million occupied homes reported water leakage from outside, a figure that underscores just how widespread exterior drainage failure is across American housing stock. The fix here is often as straightforward as adding a downspout extension or regrading the soil, but only after you’ve confirmed the gutter itself is clear and flowing correctly.

Eroded mulch beds directly below a gutter section are a quieter signal of the same problem. If you’re refilling the same two-foot section of your garden every spring, the gutter above it is doing the excavating.

Sign 4: Mold or Mildew on the Interior Wall Nearest an Exterior Gutter Run

Interior mold near an outside wall is easy to blame on humidity or a roof leak, but gutters are a common culprit that homeowners miss. When a gutter overflows consistently along a specific run, water penetrates the soffit or fascia and wicks into the wall cavity. By the time mold appears on the drywall, moisture has been sitting in the framing for a while.

Check this from the outside too. Look up at the soffit boards directly below the gutter. Staining, soft spots, or visible rot on the soffit are hard confirmation that water is getting behind the system. This is also the point at which a professional eye matters – a technician can probe the wood to determine whether the framing behind the soffit has been compromised before you close anything up.

Sign 5: Gutters That Are Over 20 Years Old with No Record of Repair

A well-installed aluminum gutter system has a long service life, but age plus Michigan winters plus any deferred maintenance shortens that window considerably. If you bought your home and have no record of when the gutters were last serviced, assume they need inspection immediately. Joints that look fine from the ground may be sealed with a layer of caulk that’s cracked and no longer waterproof. Hangers that look stable may have pulled the fastener out of the fascia by a quarter inch – enough to fail under load.

Sectional gutters with joints are especially vulnerable because each seam is a potential leak point. Seamless systems fabricated on-site eliminate most of those failure points, which is why most replacement work today moves away from the old sectional approach.

A Decision Framework: Repair or Replace?

Not every gutter problem requires a full replacement. Here’s a quick way to think about it:

What You’re Seeing Likely Action
Single sag, intact fascia Repair (rehang with new hardware)
One leaking seam or joint Repair (reseal or splice)
Multiple sags across several runs Replace
Rotted fascia behind the gutter Replace fascia first, then gutter
System over 20 years, no service history Professional inspection, likely replace
Sectional gutters with multiple leaking joints Replace with seamless system

This is what I’d call the Gutter Failure Cascade: each sign on its own is manageable, but once two or more show up together, the system is no longer protecting your home and you’re past the repair-only threshold. The cost of one well-timed replacement is almost always less than the cost of the structural repairs that follow if you wait.

If you’re in southeastern Michigan and any of these warning signs look familiar, reaching out to a local contractor who specializes in Residential Gutter Repair Services in Michigan is the fastest way to get an honest assessment of where you actually stand before the next storm season arrives.

One Last Thing: Gutter Guards Are Not a Substitute for Inspection

A lot of homeowners install leaf guards and then mentally check gutters off their maintenance list. Guards do reduce debris accumulation, and they’re worth adding after a clean, well-functioning system is confirmed. But they don’t prevent ice damming. They don’t stop shingle grit from collecting at the bottom of the channel. And they don’t fix a hanger that’s already pulling loose.

Think of guards as a maintenance reducer, not a maintenance eliminator. A yearly visual inspection – from the ground with binoculars if you’re not comfortable on a ladder – takes ten minutes and catches most of these problems while they’re still cheap to fix. Build it into your fall checklist alongside cleaning the dryer vent and checking the smoke detectors. Your foundation will thank you.

Key Takeaways

Custom iron gates function as both effective barriers and exquisite centerpieces of design, significantly enhancing the curb appeal and aesthetic of a property.

A well-crafted iron gate not only elevates property value but also leaves a lasting impression, welcoming visitors and establishing the mood for the home experience.

Compared to wood or plastic options, iron gates provide remarkable durability, often enduring for decades with appropriate upkeep.

Designing an iron gate to complement the architectural style of a property is vital in achieving a cohesive visual impact and boosting the property’s overall appeal.

Options for personalization, including size, shape, and features like lighting or automated systems, enable the creation of unique gates that showcase the owner’s personality.

Ensuring expert installation allows for optimal fit and functionality of iron gates, making precise measurements and professional skills indispensable.

Maintaining iron gates is quite manageable, involving simple tasks like rust prevention, lubricating hinges, and regular cleaning, helping to keep them looking great over time.

Unveiling the Beauty: Why Custom Iron Gates Are a Smart Investment

Enhancing Curb Appeal with Functional Artistry

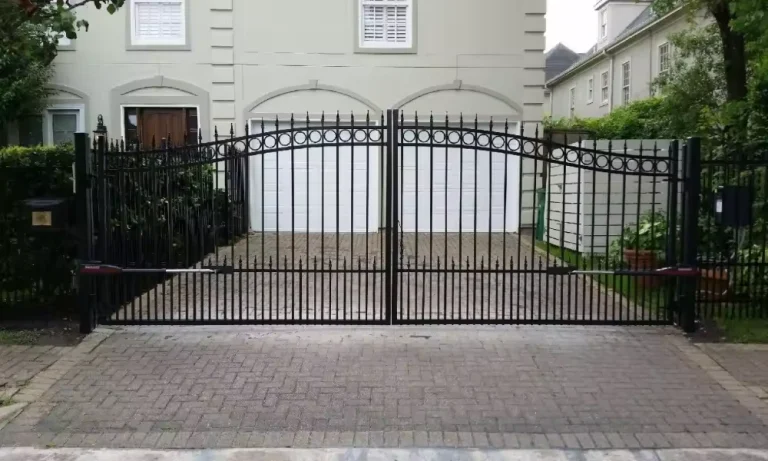
Custom iron gates aren’t just barriers; they stand as stunning examples of craftsmanship and artistic design. Many homeowners find that selecting the right gate can drastically improve the look of their property. Indeed, these gates elevate unremarkable entrances into impressive entrances. They are like jewelry for a home-telling a story of character and style. From sleek modern designs to vintage inspirations, every fine detail is significant.

Yet, their charm goes beyond aesthetics. These gates create a powerful first impression, warmly inviting guests and setting expectations for the experiences within. Industry professionals often agree that an intricately designed gate has the potential to increase property value, making it a wise investment. A captivating entrance not only draws attention; it also hints at the beauty contained inside.

  • Artistic expression: Iron gates provide a platform for homeowners and business proprietors to express their unique tastes.
  • Increased value: Properties featuring custom designs generally attract more interest from potential buyers.
  • First impressions: A remarkable entrance evokes curiosity and admiration.

Long-lasting Durability: A Testament to Quality Craftsmanship

In the quest for durability, custom iron gates rank among the top choices. Unlike wooden or plastic gates, iron stands strong against various elements, maintaining its integrity over the years. The skill of the craftsman plays a critical role, and experts highlight the need to choose a manufacturer that emphasizes high-quality materials and careful installation.

These gates endure extreme weather conditions-be it bitter cold or excessive heat-without warping or breaking down. With proper care, a well-maintained iron gate can last for many years, sometimes even generations. Applying protective coatings and engaging in regular upkeep are essential to achieve this durability. Such maintenance not only keeps the gate looking great but also ensures it serves its primary purposes: providing security and enhancing curb appeal.

“Invest in quality now, and enjoy beauty that stands the test of time.” – Ironworks Expert

Designing Your Perfect Iron Gate: Key Considerations

Choosing the Right Style: From Modern Minimalism to Classic Elegance

With an array of styles to choose from, picking the ideal design for a custom iron gate can be a daunting task. One of the initial steps involves ensuring alignment with the property’s architectural style. For those leaning towards a modern aesthetic, flowing lines paired with subtle embellishments can create an inviting appearance. Alternatively, those seeking classic elegance might choose gates adorned with intricate scrollwork that draws the eye.

It’s essential to reflect on how the style relates to the character of the home or business setting. For example, a stately estate might benefit from an opulent wrought-iron design, while a minimalist home may call for something sleeker and more understated. By focusing on the gate’s harmony with its surroundings, homeowners can make choices that elevate the overall visual experience.

  • Modern styles: Highlight clean lines and simplicity.
  • Classic designs: Often showcase elaborate scrollwork and ornate details.
  • Customized touches: Add personal elements to narrate a unique story.

Personalization Options: Tailoring Size and Shape for Every Need

No two properties are alike, which is why personalization is key in designing iron gates. Home and business owners can select from various shapes, sizes, and finishes. This becomes especially important when gates need to meet specific dimensions due to unique property layouts.

Clients frequently explore integrating features such as built-in lighting or automated entry systems. These modern conveniences enhance both security and ease of access while syncing with contemporary lifestyles. Ultimately, a personalized iron gate transforms from just a physical barrier into a striking representation of the owner’s individuality.

“A gate should tell a story about who lives behind it.” – Design Specialist

Installation Insights: What to Expect When Ordering Custom Iron Gates

Expert Installation Tips for a Flawless Fit

Understanding the installation process for custom iron gates is crucial to achieving a successful outcome. First and foremost, precise measurements are vital. Even minor errors can result in a host of problems during installation. Professional advice often recommends working with experienced installers who specialize in custom designs. They’re adept at accommodating differences in ground levels, entry widths, and more.

Installation teams come equipped with the necessary tools and expertise that not only accelerate the process but also ensure a secure and effective installation. This phase is essential. If executed correctly, the gate will not only operate smoothly but will also enhance the overall visual cohesion with its environment. Professionals emphasize the need for secure anchoring in various surfaces-whether concrete, gravel, or pavers. A properly installed gate stands strong and adds to the visual allure.

  • Precision measurements: Critical for achieving a flawless fit right from the outset.
  • Professional expertise: Collaborate with skilled installers to ensure quality and durability.
  • Surface considerations: Factor in the type of landscape and ground beneath the installation.

Maintenance Made Simple: Keeping Your Gate Looking New

Maintaining iron gates may appear challenging, yet it’s surprisingly simple. Regular inspections for rust and applying protective finishes are key components to keeping gates in excellent shape. Home and business owners often appreciate that only basic tools are required for routine maintenance. A straightforward upkeep routine typically involves wiping surfaces and checking for wear and tear.

Among the most recommended practices is the periodic lubrication of hinges to prevent creaking and ensure smooth operation. It’s wise to remain vigilant for any obstacles that may impede functionality. These efforts collectively help extend the gate’s lifespan while preserving its aesthetic appeal.

  • Rust prevention: Regularly apply protective coatings to guard against deterioration.
  • Inspect hinges: Keep them lubricated for proper functionality.
  • Routine cleanings: Simple wipe-downs help maintain visual charm.

Real-World Applications: Iron Gates for Homes and Businesses

Protecting Your Property: Security Features That Don’t Compromise Style

Custom iron gates are synonymous with security, all without compromising elegance. Homeowners frequently voice their concerns about safety but also desire to uphold the beauty of their entrances. Innovative designs seamlessly integrate features like lockable mechanisms and fortified frameworks, ensuring properties remain secure. Clients consistently express gratitude for the harmony of aesthetic appeal and safety.

However, it’s important to note that security depends not just on the gate itself but also on surrounding elements. Adequate lighting, strategic landscaping, and smart entry systems all contribute to enhancing security and deterring unwanted access. When these components work in concert, they create an effective and visually pleasing barrier.

“A gate that secures is one that invites.” – Security Consultant

Creating Inviting Spaces: How Iron Gates Enhance Outdoor Areas

Aside from security, custom iron gates enrich outdoor environments, crafting warm and inviting areas for both homes and businesses. These gates often act as gateways to gardens, courtyards, and patios, encouraging exploration of the spaces beyond. As outdoor living becomes increasingly prized, the function of entrance gates has transitioned from mere utility to significant impact.

Many homeowners claim their custom gates foster a sense of welcome, sparking enjoyment during outdoor gatherings with family and friends. Likewise, businesses discover that beautifully crafted gates significantly increase foot traffic. From restaurants to retail stores, a striking entryway can entice visitors, conveying a sense of what’s inside.

  • Inviting atmosphere: Foster appealing access to gardens and patio areas.
  • Foot traffic boost: Attractive gates encourage more visitors to business locations.
  • Fostering connections: Custom gates promote social interactions and community gatherings.

FAQ

What materials can be used in combination with iron gates?

Many homeowners opt to complement iron gates with materials like wood, stone, or glass. These combinations can create a distinctive aesthetic that enhances visual appeal while retaining the iron’s durability.

How do custom iron gates compare to other gate materials in terms of cost?

While custom iron gates often have a higher upfront cost compared to wood or vinyl alternatives, their longevity and low maintenance requirements frequently render them a more prudent long-term investment. Clients tend to appreciate the lasting value, as these gates typically don’t require replacement as often.

Can custom iron gates be automated for convenience?

Definitely. Many homeowners choose automated entry systems to enable easy access without sacrificing security. These systems can seamlessly integrate with smart home technology for added convenience.

Do iron gates require specific types of paint or finishes for protection?

Yes, it’s advisable to use specialized paints and coatings meant for metal surfaces to protect against rust and wear. Homeowners often learn that applying quality finishes not only enhances appearance but also extends the life of the gate.

What potential customization options are available for iron gates?

Customization options range from intricate designs to preferred color choices, hardware details, and additional features such as intercom systems. Clients can craft gates that reflect their unique aesthetic and functional preferences.

Are there specific regulations or permits needed for installing iron gates?

Local regulations might establish particular standards for gate installation, including height and design requirements. Professionals recommend consulting local authorities to ensure all compliance measures are met prior to moving forward with design and installation decisions.

How does an iron gate installation affect landscaping?

The addition of an iron gate can significantly improve the surrounding landscape. Clients often observe that a thoughtfully positioned gate complements outdoor design features, establishing a unified look while clearly marking their property entrance.

What’s the role of lighting in relation to custom iron gates?

Lighting serves an essential role in boosting the visual appeal and security of iron gates. Strategically placed lights can illuminate entryways, making them more inviting while also acting as a deterrent for potential intruders.

Useful Resources

Clear, refreshing water can make a home feel more comfortable and easier to manage. Yet, hard water can quietly create problems with cloudy dishes, rough skin, and stained fixtures. These minor signs can become frustrating when cleaning takes more effort than expected.

A professional water treatment company in Connecticut can identify these concerns and provide solutions that fit the home. Proper testing helps reveal mineral levels and guides homeowners toward suitable treatment options. Let’s know about the key red flags that may signal hard water problems in Connecticut.

White Spots Appear On Dishes And Shower Doors

Cloudy marks on dishes, glassware, and shower doors may point to excess minerals in the water supply. These spots usually appear after washing and can become harder to remove over time. Homeowners in Connecticut may notice that regular cleaning does not fully restore the shine of affected surfaces. Mineral deposits from this issue can leave visible residue on different areas of the home.

Soap Scum Remains On Bathroom Surfaces in Connecticut

Soap that does not rinse away easily can indicate a possible hard water issue in the home. Mineral content can reduce soap effectiveness and leave a stubborn film on tubs, sinks, and shower walls. This residue may require extra cleaning effort to maintain a fresh bathroom appearance. A quality check by experts in Connecticut can help determine if mineral levels contribute to these concerns.

Mineral Deposits Block Fixtures And Reduce Flow

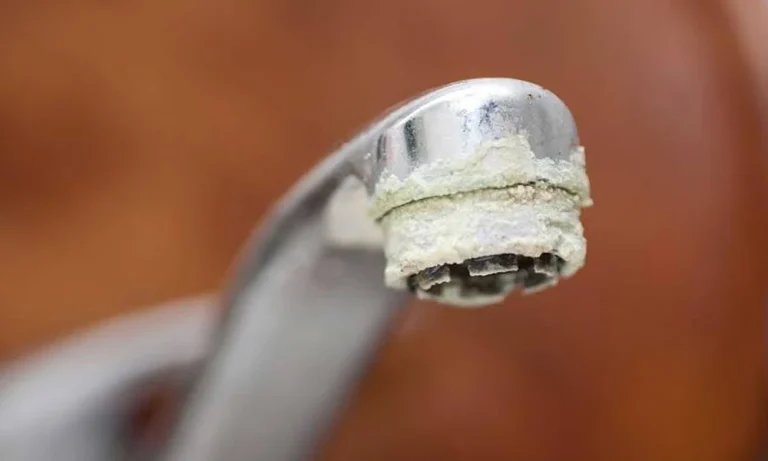
Calcium and other minerals may collect inside faucets, shower heads, and plumbing parts over time. These deposits can create restricted water flow and affect how fixtures perform around the house. Homeowners in Connecticut may notice uneven spray patterns or frequent cleaning needs for these areas. Accurate testing can confirm whether hardness levels contribute to mineral deposit concerns.

Health Concerns Linked To Mineral Deposits

Here are the possible health concerns linked to mineral deposits:

  • Dry skin irritation from mineral-rich water exposure.
  • Increased skin sensitivity after regular showers.
  • Rough skin texture caused by mineral residue buildup.
  • Scalp dryness linked to mineral deposits.
  • Difficulty rinsing products due to mineral-heavy water.
  • Skin discomfort caused by reduced moisture retention after washing.

Tests Reveal High Mineral Content Levels

An inspection and test provide clear details about hardness levels and other water quality factors in a home. Professional testing in Connecticut can check minerals such as iron, hardness, sulfur, pH, and total dissolved solids. These results help homeowners understand the exact cause of concerns instead of relying on assumptions. A recommended treatment option, such as a softener, can then match the specific needs of the property.

Dry Skin Appears After Regular Shower Routines

You might notice changes in how your skin feels after showers when hard water affects homes. Mineral-rich water may leave a different feeling on the skin and make rinsing products more difficult. This concern can become frustrating for households that prefer a smoother shower experience. A proper treatment solution by professional teams in Connecticut can address hardness issues based on test results and household needs.

Appliances Show Signs Of Mineral Buildup

Water-using appliances may develop performance issues when minerals collect inside their components. Coffee makers, water heaters, and other equipment can experience reduced efficiency when scale forms over time. These deposits may shorten appliance life and create extra maintenance needs for homeowners. A suitable treatment system can help manage the minerals and support better appliance operation.

Hard water signs like mineral stains, soap residue, and appliance issues can affect home comfort and water quality over time. A water treatment company in Connecticut can help identify these concerns with proper testing and recommend solutions that match the home’s needs. Check for the warning signs and request a professional inspection before problems grow.